Migrate from v3
A guide to help you migrate from Zipline v3 to v4.
You must be on v3.7.12 or higher to use the export feature. Additionally, to see the Export all Server Data (JSON) button, you must be logged in as a super-admin.
If you have lost access to your super-admin account, you can utilize the set-user while still running v3.
Preparation
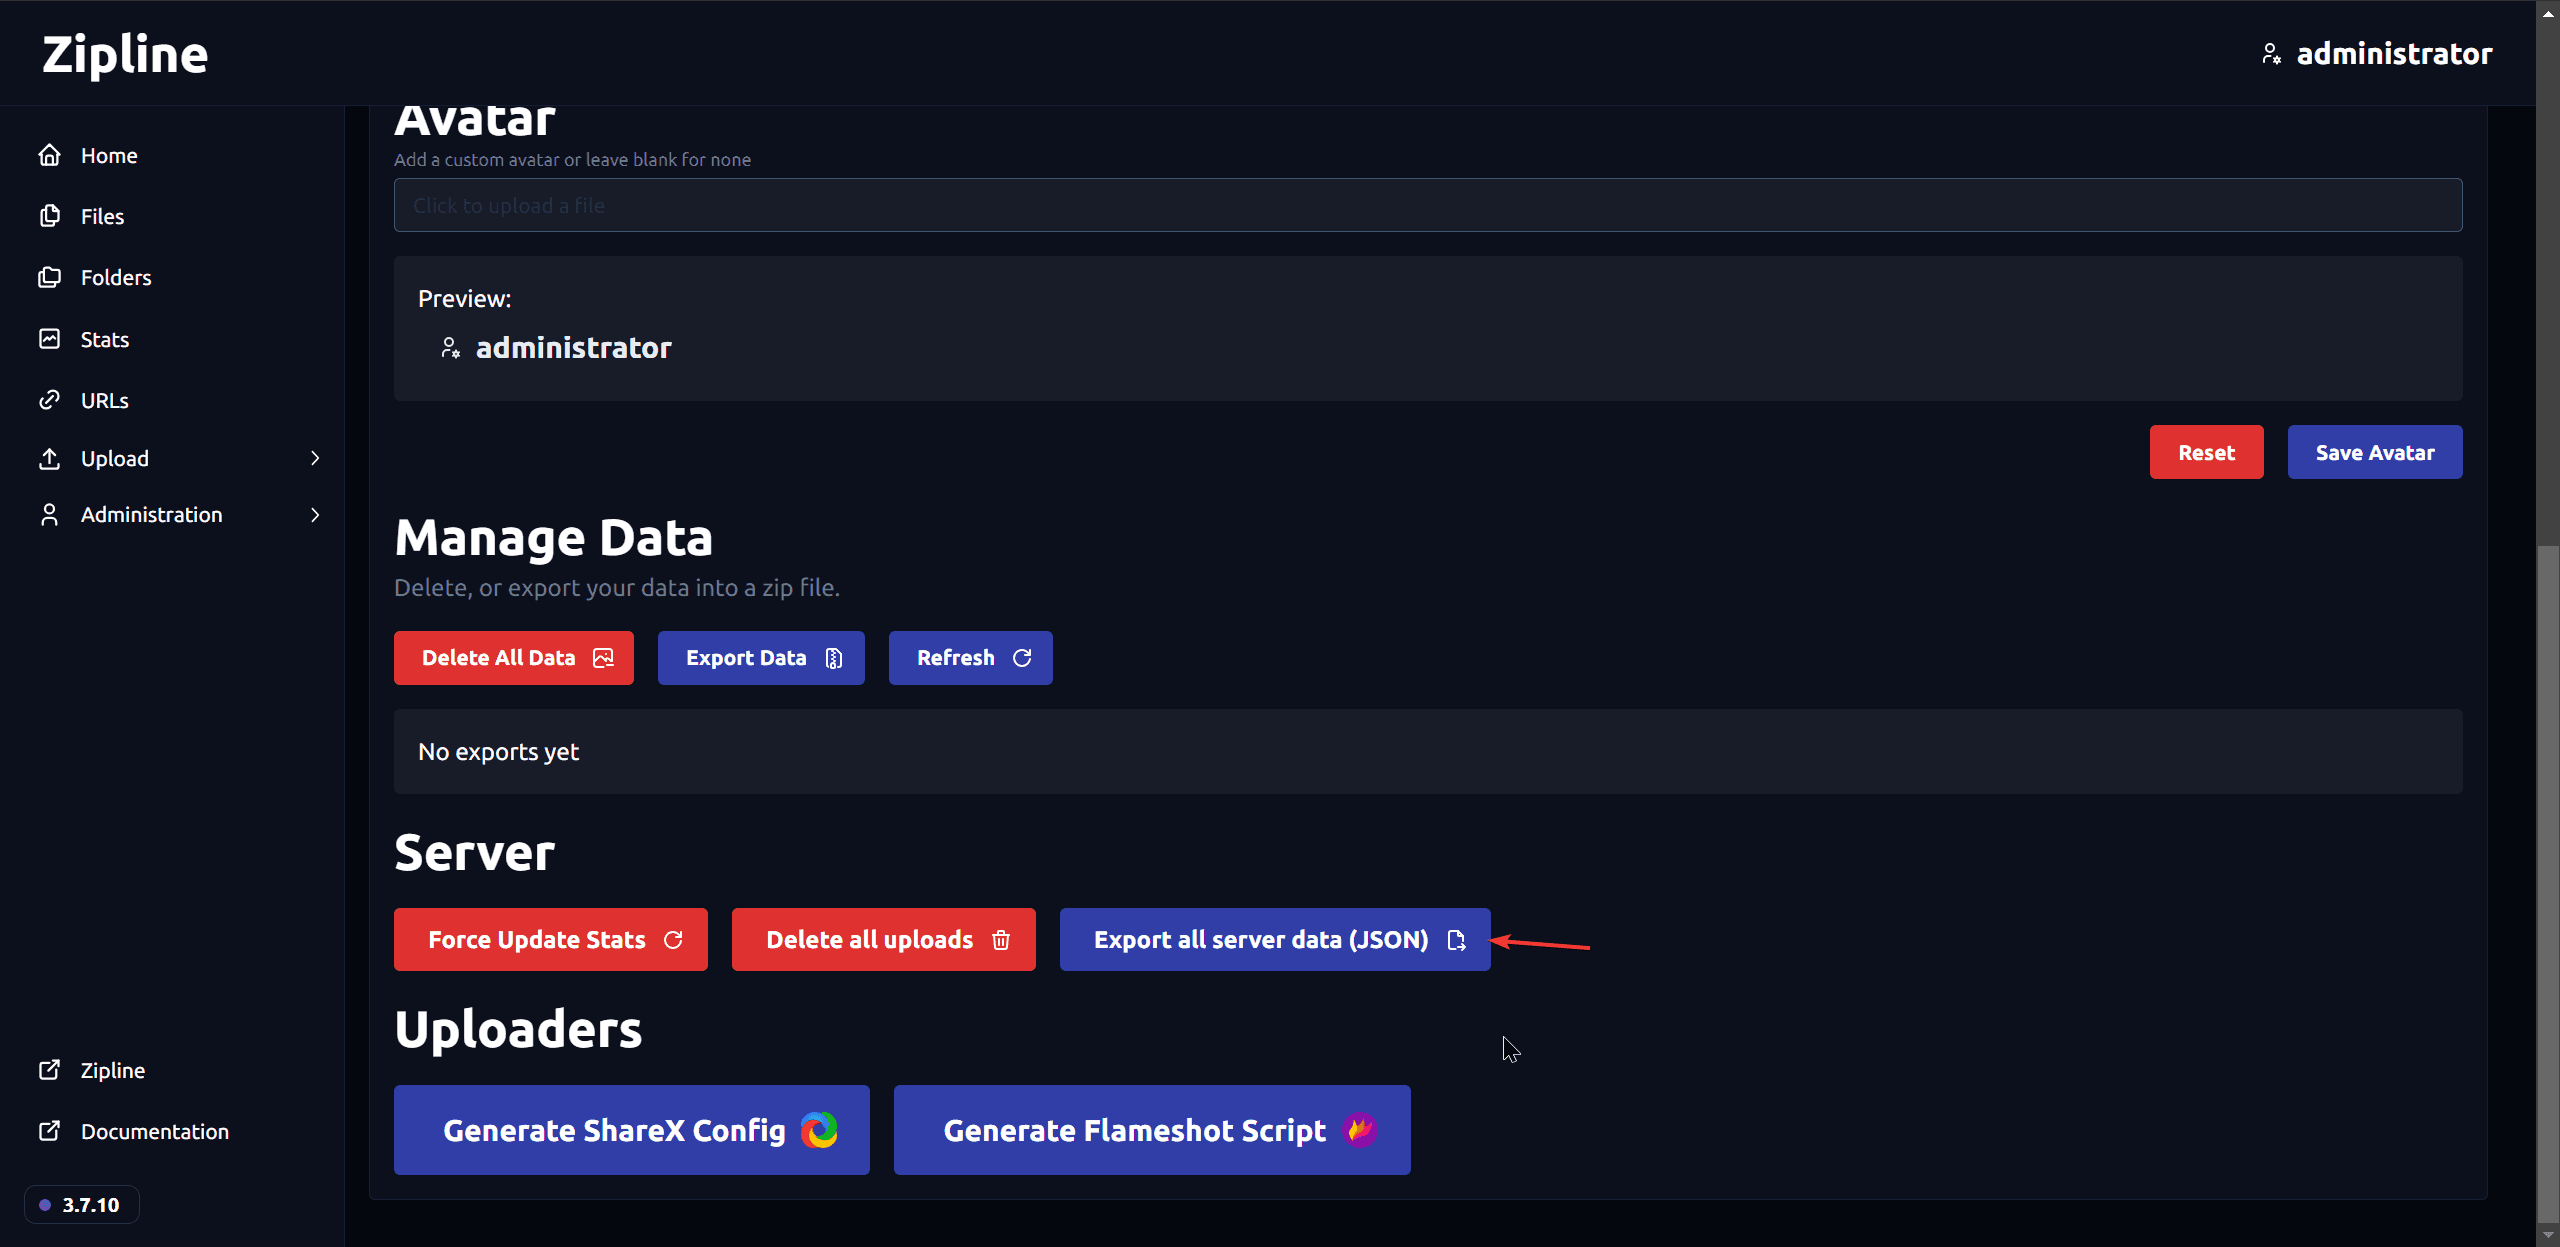
Before you start, navigate to your v3 instance's manage account page and follow the steps below to export your data:
Export all Server Data
Click the "Export all Server Data (JSON)" button to start preparing a JSON file that contains all your server data.
Confirm Export
Click "Yes" after confirming the export.

The export contains sensitive information, such as passwords, API keys, 2fa secrets, and more. Make sure to keep the file secure and delete it after the migration.
Wait for the export file to be prepared
After clicking yes, the server will start preparing the export file. This may take a few seconds to a few minutes, depending on the size of your data. Once the file is ready, your browser will prompt you to download it. Make sure to save it in a secure location, as it contains sensitive information.

Setting up v4
The process is made much easier when using Docker, so this guide will assume you are using Docker. If you are not using Docker, you can still follow along, but you will have to adjust the commands accordingly.
For the first few steps, keep the v3 instance running. We will need to access the postgres database to create a new database.
Pull the latest v4 image
docker pull ghcr.io/diced/zipline:latestEnter psql CLI
Enter the database of your old v3 instance, so that we can create the new database.
docker compose exec postgres psql -U postgres # or whatever your postgres user is configured asCreate a new database for v4
CREATE DATABASE zipline_v4; -- you may name this anythingYou may run into an error that says ERROR: template database "template1" has a collation version mismatch, run ALTER DATABASE template1 REFRESH COLLATION VERSION; in the postgres CLI to rebuild all of the objects in the template
database using the new version, and you should be able to proceed with
creating the database.
Environment Variables
Almost all environment variables supported in v3 are no longer supported in v4. This is because v4 has a new configuration system that is handled entirely through the dashboard. Only a handful of environment variables are needed to get v4 running.
Here are some variables that you will need to keep/rename:
CORE_DATABASE_URL->DATABASE_URL(change the database at the end, to the new database you created in the above steps)CORE_HOST-> is nowCORE_HOSTNAMECORE_PORTCORE_SECRET-> this must be a string of at least 32 characters, or it will be rejected. It is recommended to just generate a new secret. (you may want to close this in single quotes if you're using a password generator)DATASOURCE_TYPE-> only supportss3orlocalDATASOURCE_LOCAL_DIRECTORYDATASOURCE_S3_ACCESS_KEY_IDDATASOURCE_S3_SECRET_ACCESS_KEYDATASOURCE_S3_BUCKETDATASOURCE_S3_REGIONDATASOURCE_S3_ENDPOINTDATASOURCE_S3_REGIONDATASOURCE_S3_PORT-> no longer supported, include the port in the endpointDATASOURCE_S3_FORCE_S3_PATH->DATASOURCE_S3_FORCE_PATH_STYLEDATASOURCE_S3_USE_SSL-> no longer supported
SSL_CERT-> no longer supportedSSL_KEY-> no longer supportedSSL_ALLOW_HTTP1-> no longer supported
After these changes, your environment section in your docker-compose file may look something like this:
environment:
  - DATABASE_URL=postgres://postgres:postgres@postgres:5432/zipline_v4
  - CORE_HOSTNAME=0.0.0.0
  - CORE_PORT=3000
  - CORE_SECRET=supersecret234567890qwertyuiopasdfghjklzxcvbnm
  - DATASOURCE_TYPE=local
  - DATASOURCE_LOCAL_DIRECTORY=./uploads
or...
environment:
  - DATABASE_URL=postgres://postgres:postgres@postgres:5432/zipline_v4
  - CORE_HOSTNAME=0.0.0.0
  - CORE_PORT=3000
  - CORE_SECRET=supersecret234567890qwertyuiopasdfghjklzxcvbnm
  - DATASOURCE_TYPE=s3
  - DATASOURCE_S3_ACCESS_KEY_ID=youraccesskey
  - DATASOURCE_S3_SECRET_ACCESS_KEY=yoursecretkey
  - DATASOURCE_S3_BUCKET=yourbucket
  - DATASOURCE_S3_REGION=yourregion
  - DATASOURCE_S3_ENDPOINT=yourendpoint # not needed for amazon aws s3
All other environment variables will have no effect on the server.
Zipline will fail to run if the database URL is the same as the one used in v3. This is because the database schema has changed significantly between v3 and v4.
Migrating Data
Restart the instance
docker compose down
docker compose up -d
If you would like you can view the logs to make sure everything is running correctly.
docker compose logs -fNavigate to your instance and create a user
On the first launch, you will be prompted to setup a super-admin account.
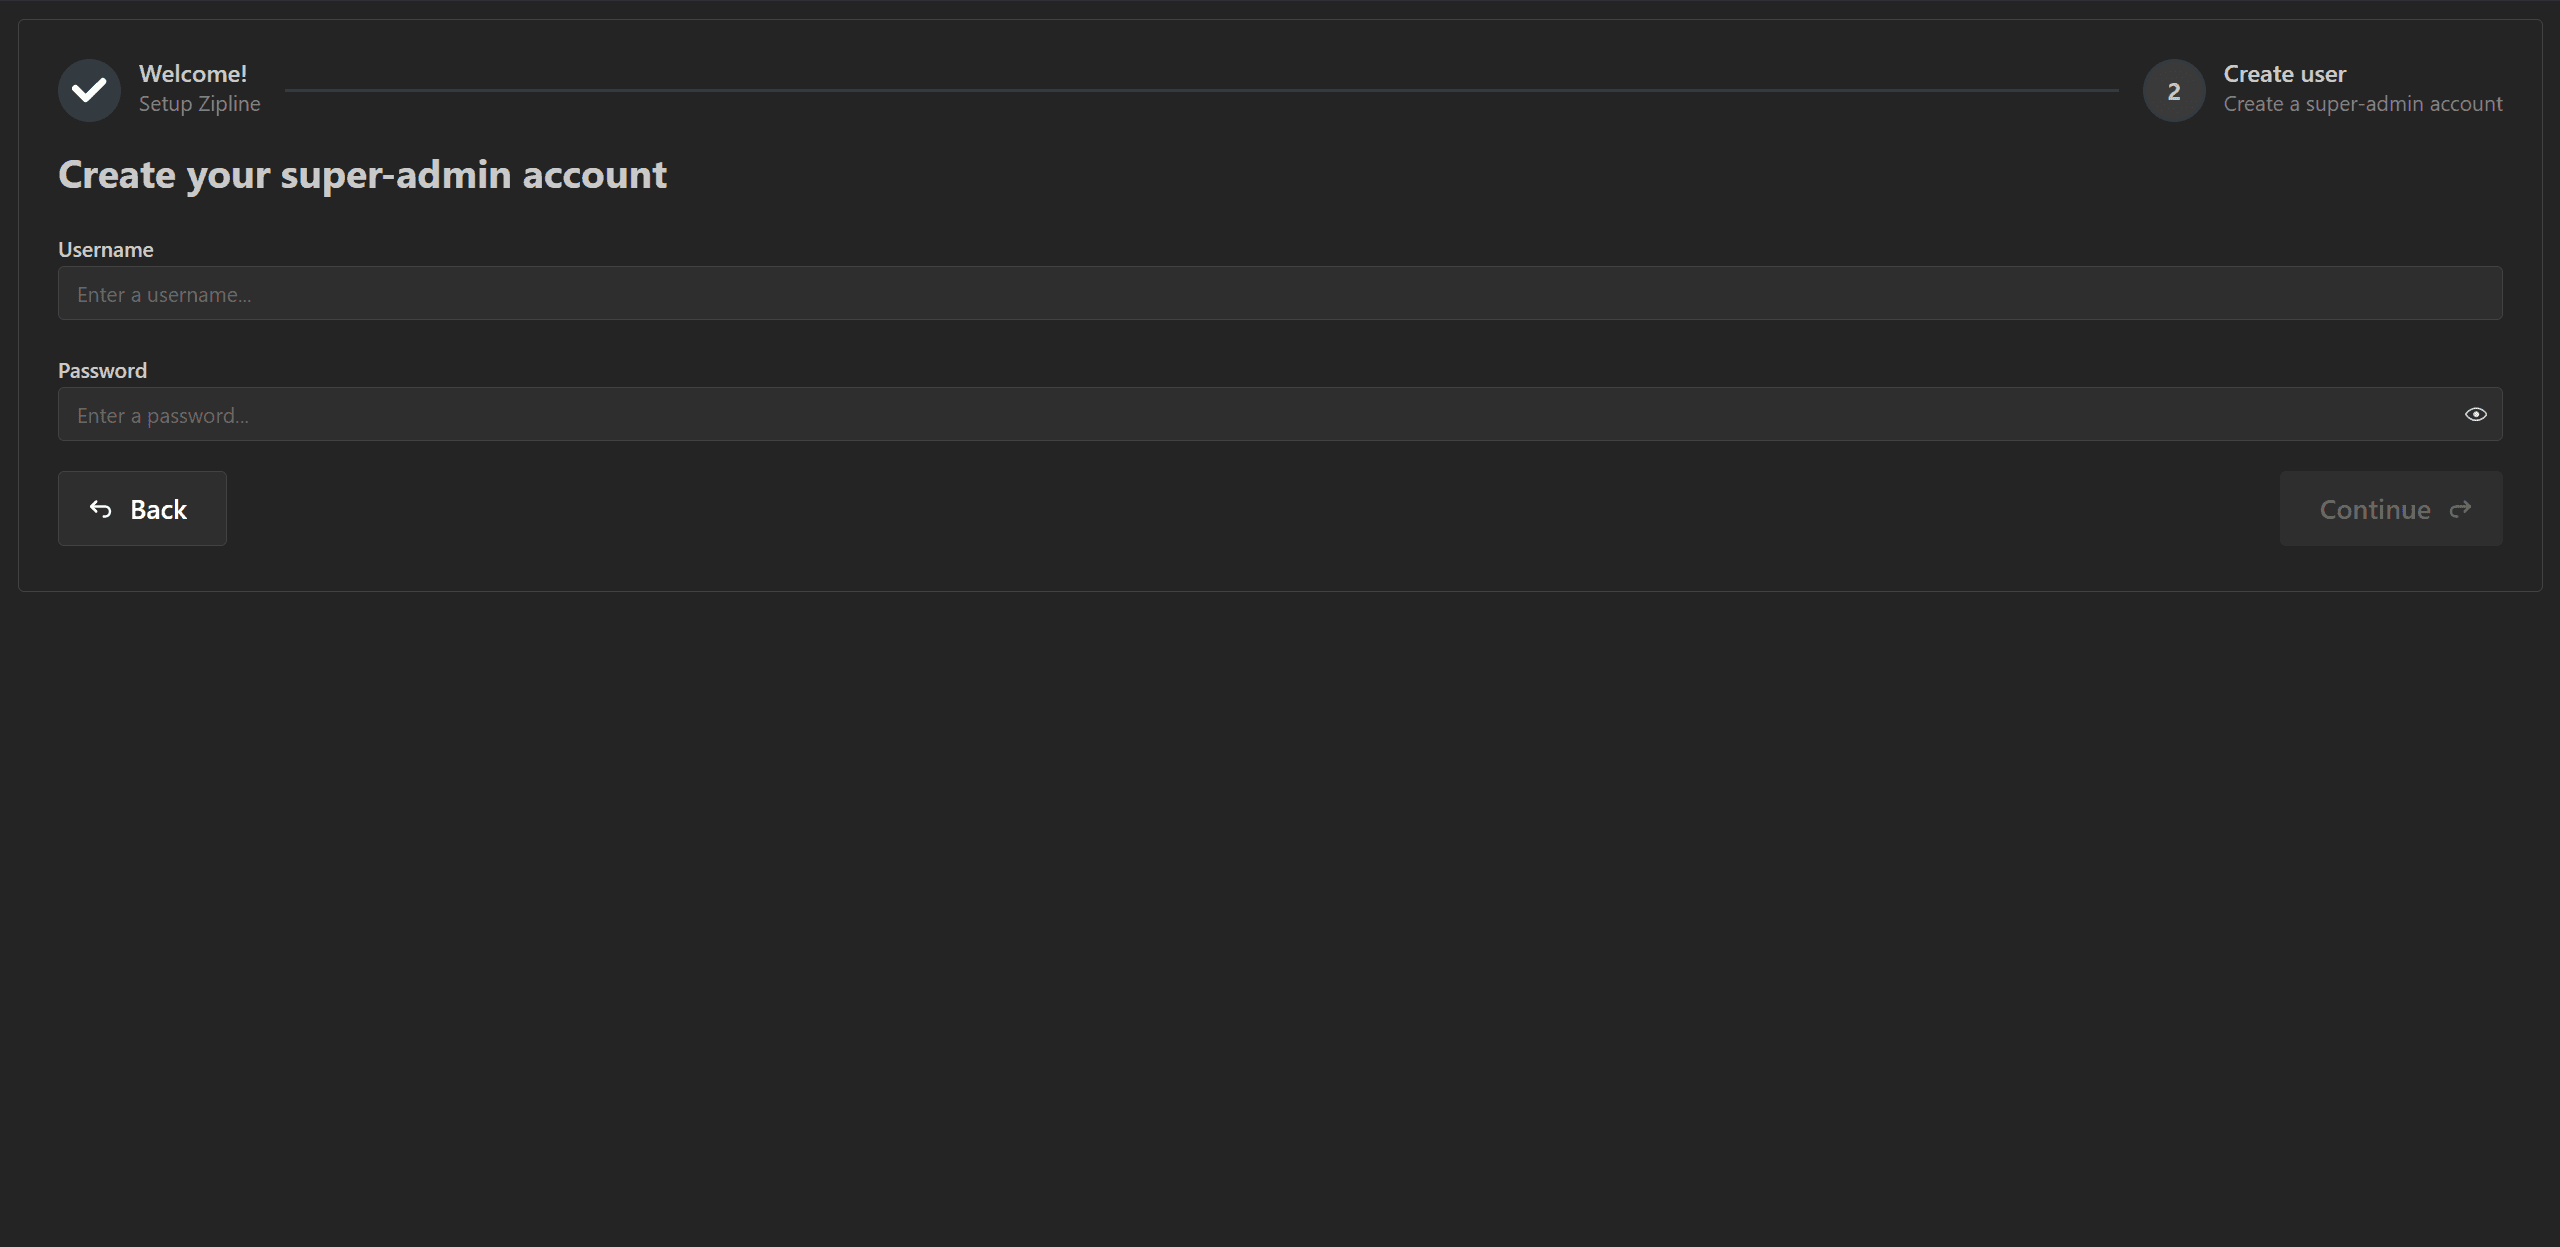
Enter a username and password, then click "Continue", then "Finish".
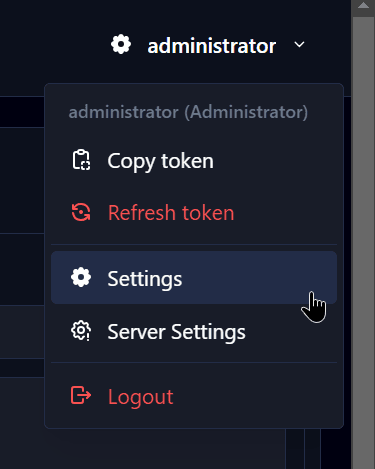
Navigate to Settings
After being redirected to the dashboard, click on your username in the top right corner, then click on "Settings" in the dropdown menu.
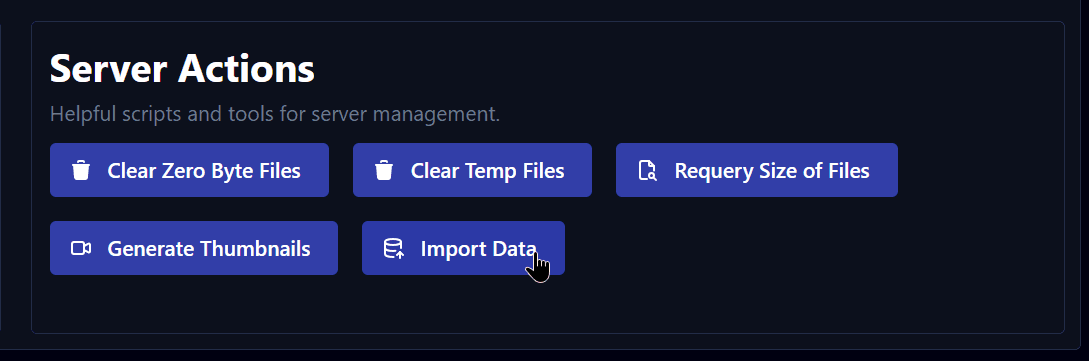
Upload the export file
Click on "Upload Export (JSON)", and select the JSON file you downloaded earlier from your v3 instance.
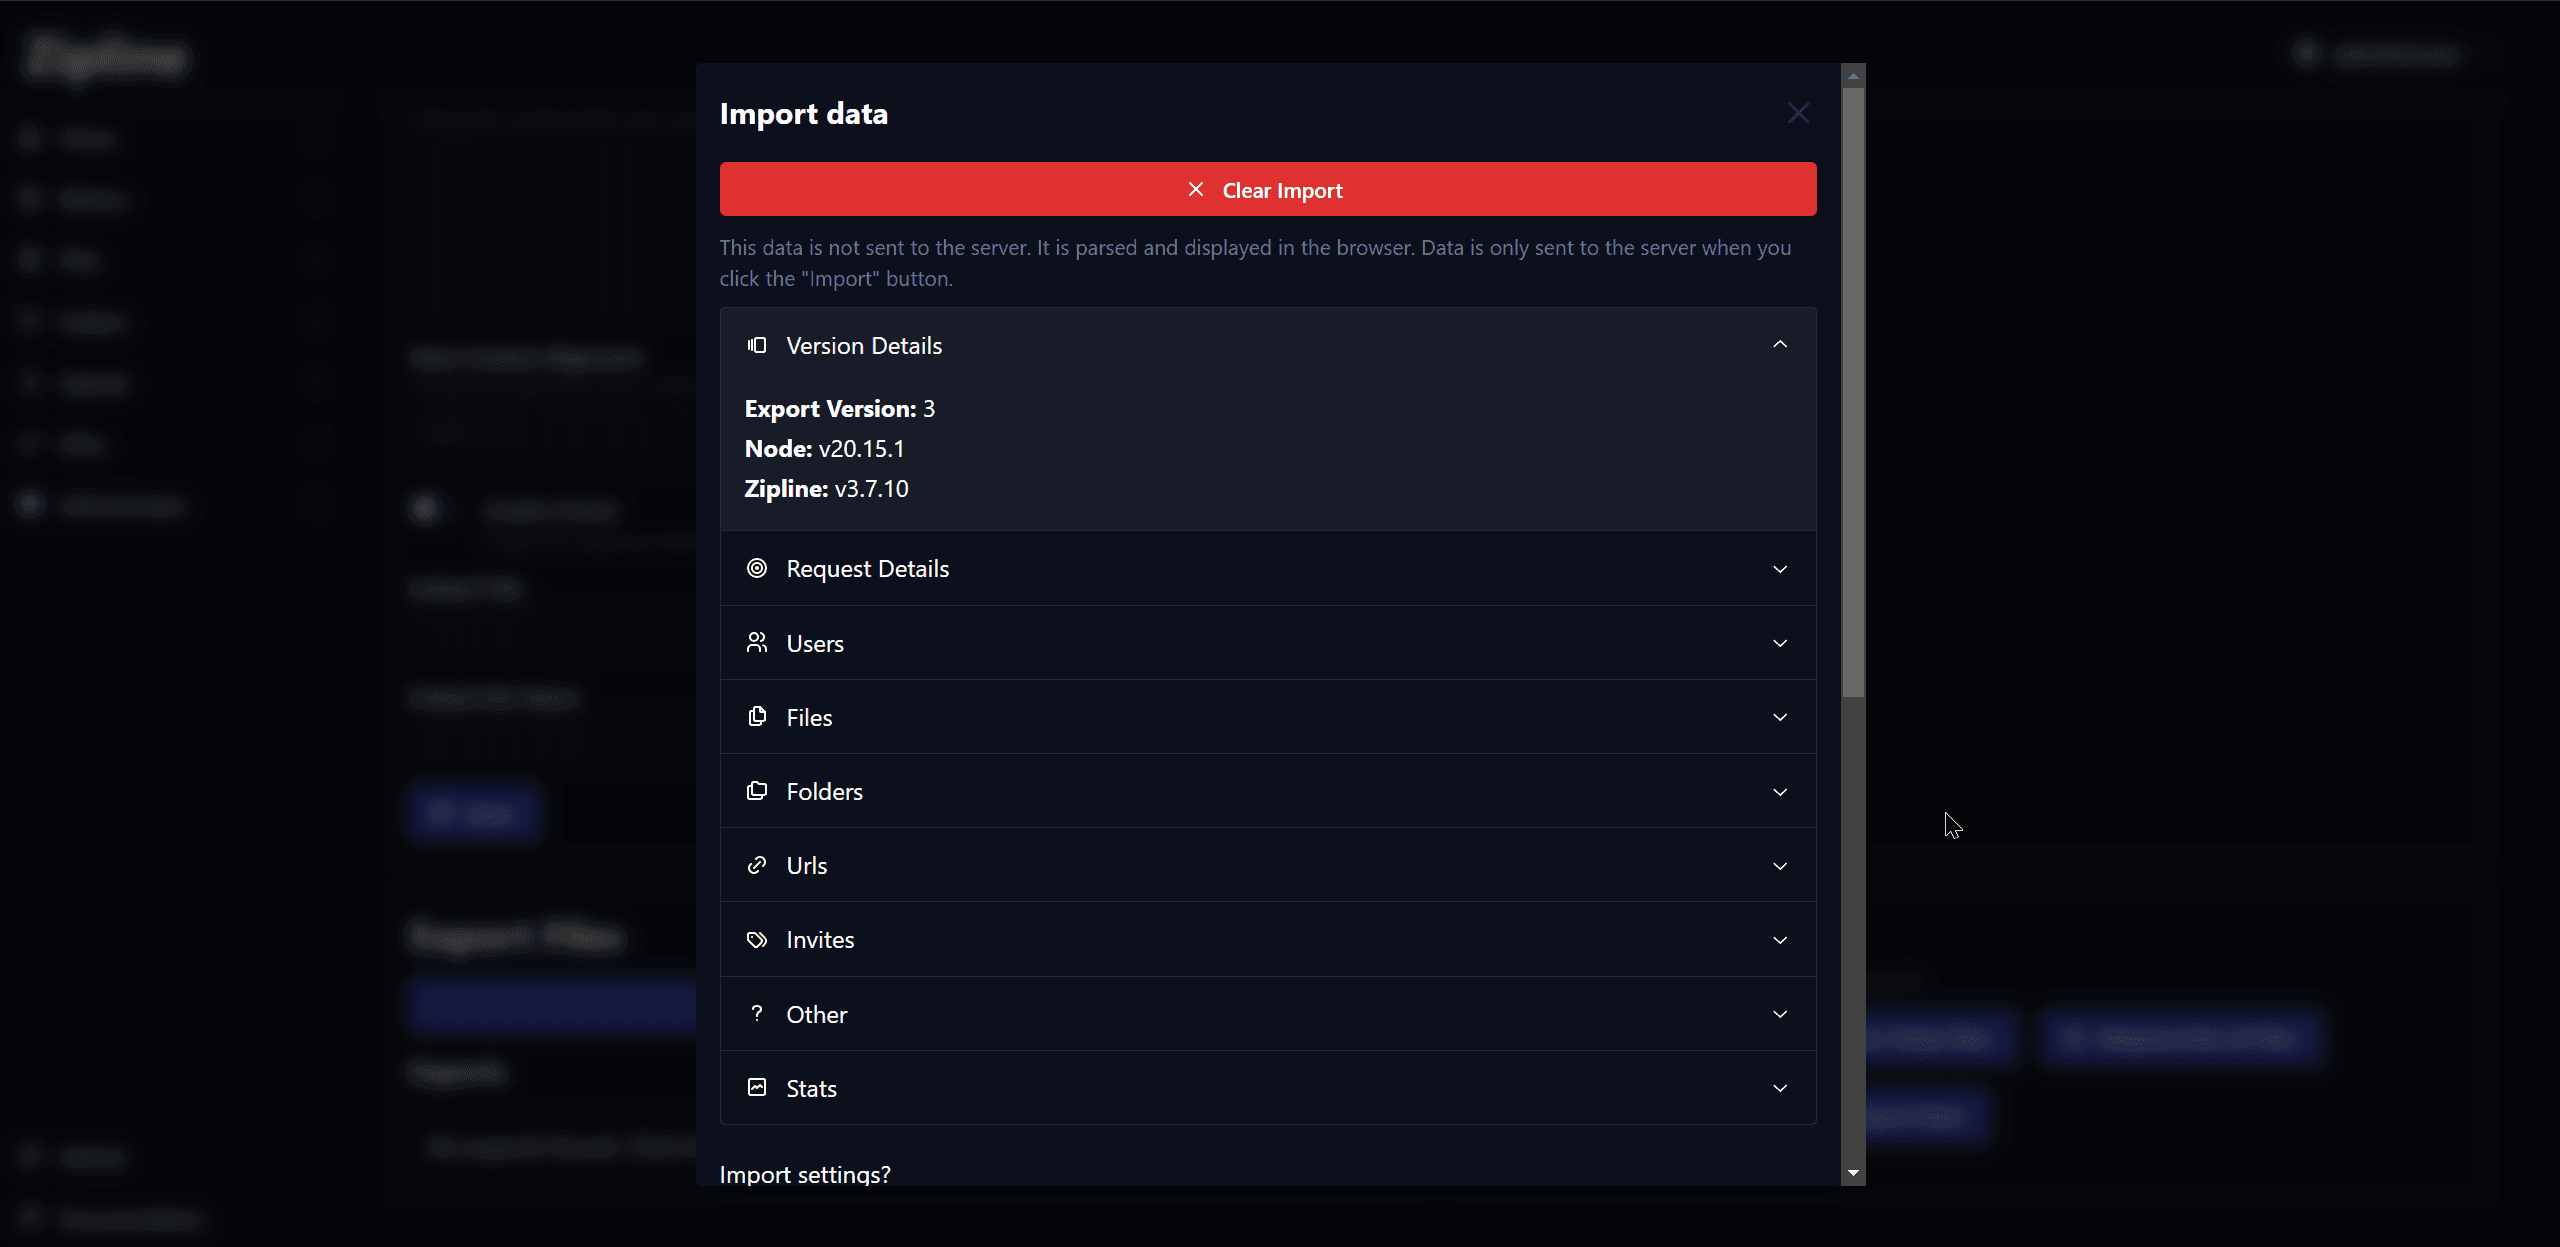
View the data to be imported
Once the file is selected, you will see a modal with all the data that will be imported. This includes the number of users, files, and other data that will be imported.
Import Options
After scrolling down within the modal, you will see two options: "Import Settings?" and "Select a user to import data from into the current user."
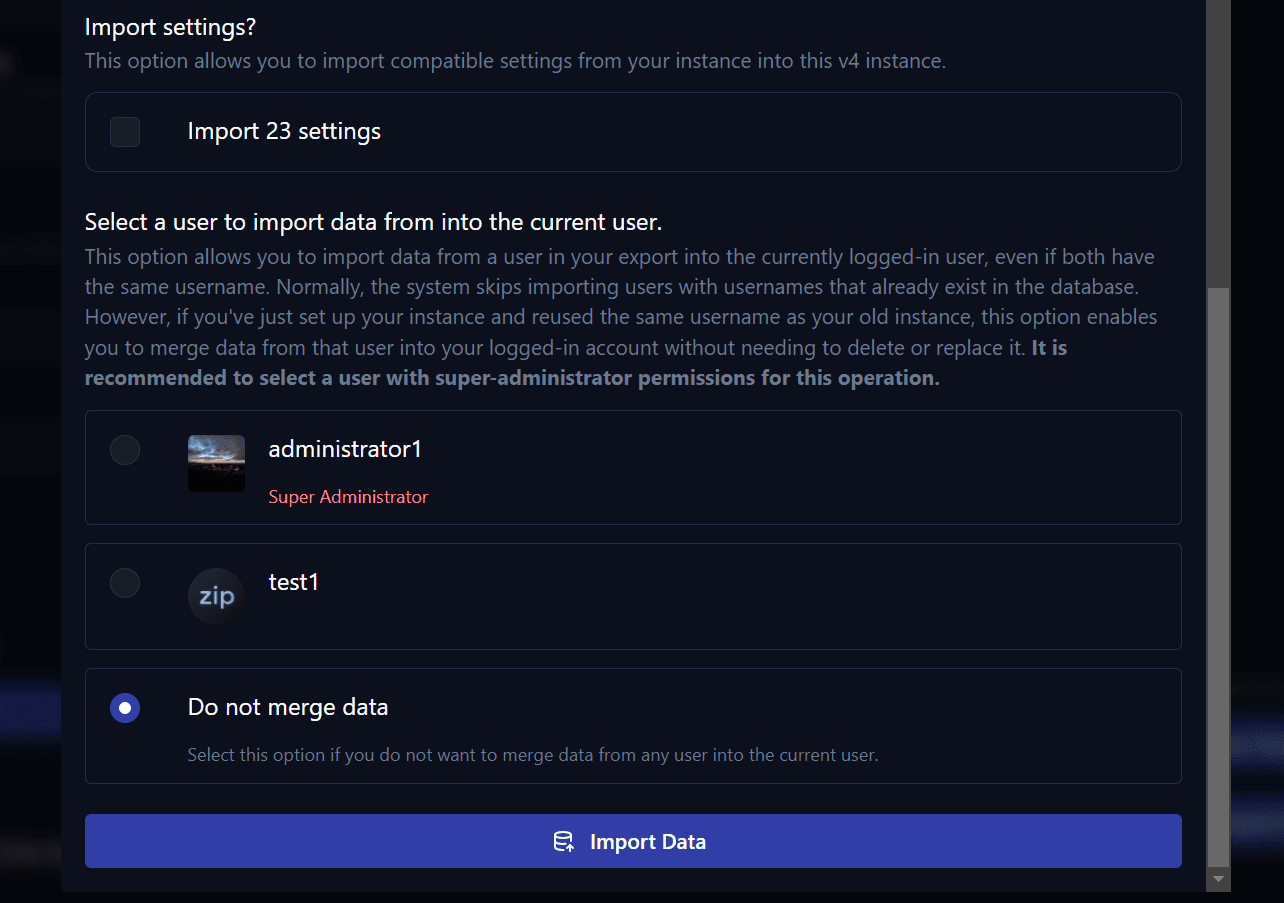
Import Settings
When checking this box, Zipline will attempt to import settings that are compatible with v4 from the v3 instance.
Import User Data
This option allows you to merge data from a user in your export to the currently logged in user (the one you have just setup). This is useful if you used the same username in v3 and v4, as without selecting an option, the importer will skip over the user data that is already present.
It is recommended to select the user you want to import data from, as this will merge the data from the user in the export to the currently logged in user.
Users that were a super-admin on v3 will also be labelled in red.
Finalize Migration
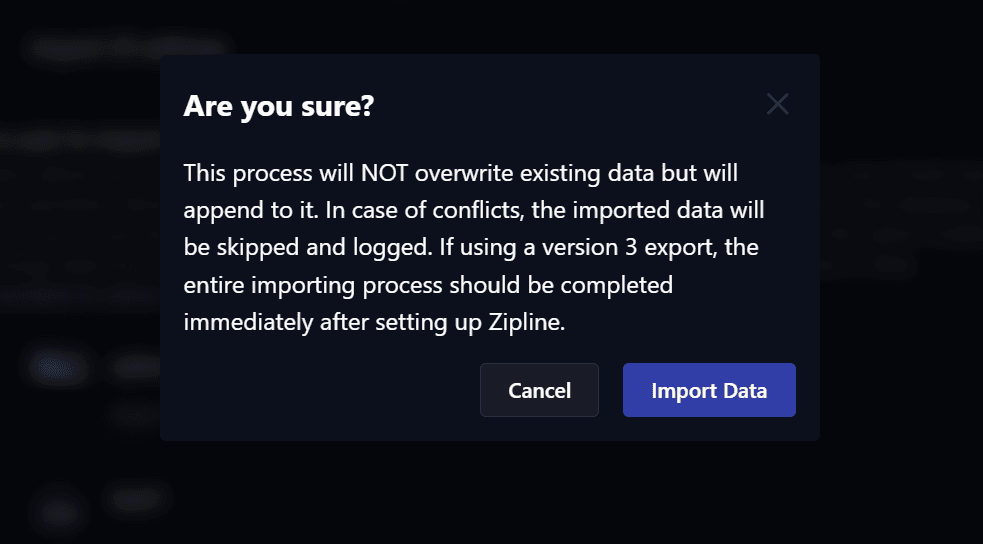
Import Data
After selecting the options you want, click "Import Data". The server will now start importing the data. You will be prompted to confirm the import. Read the alert, then click "Import Data" to start the import.
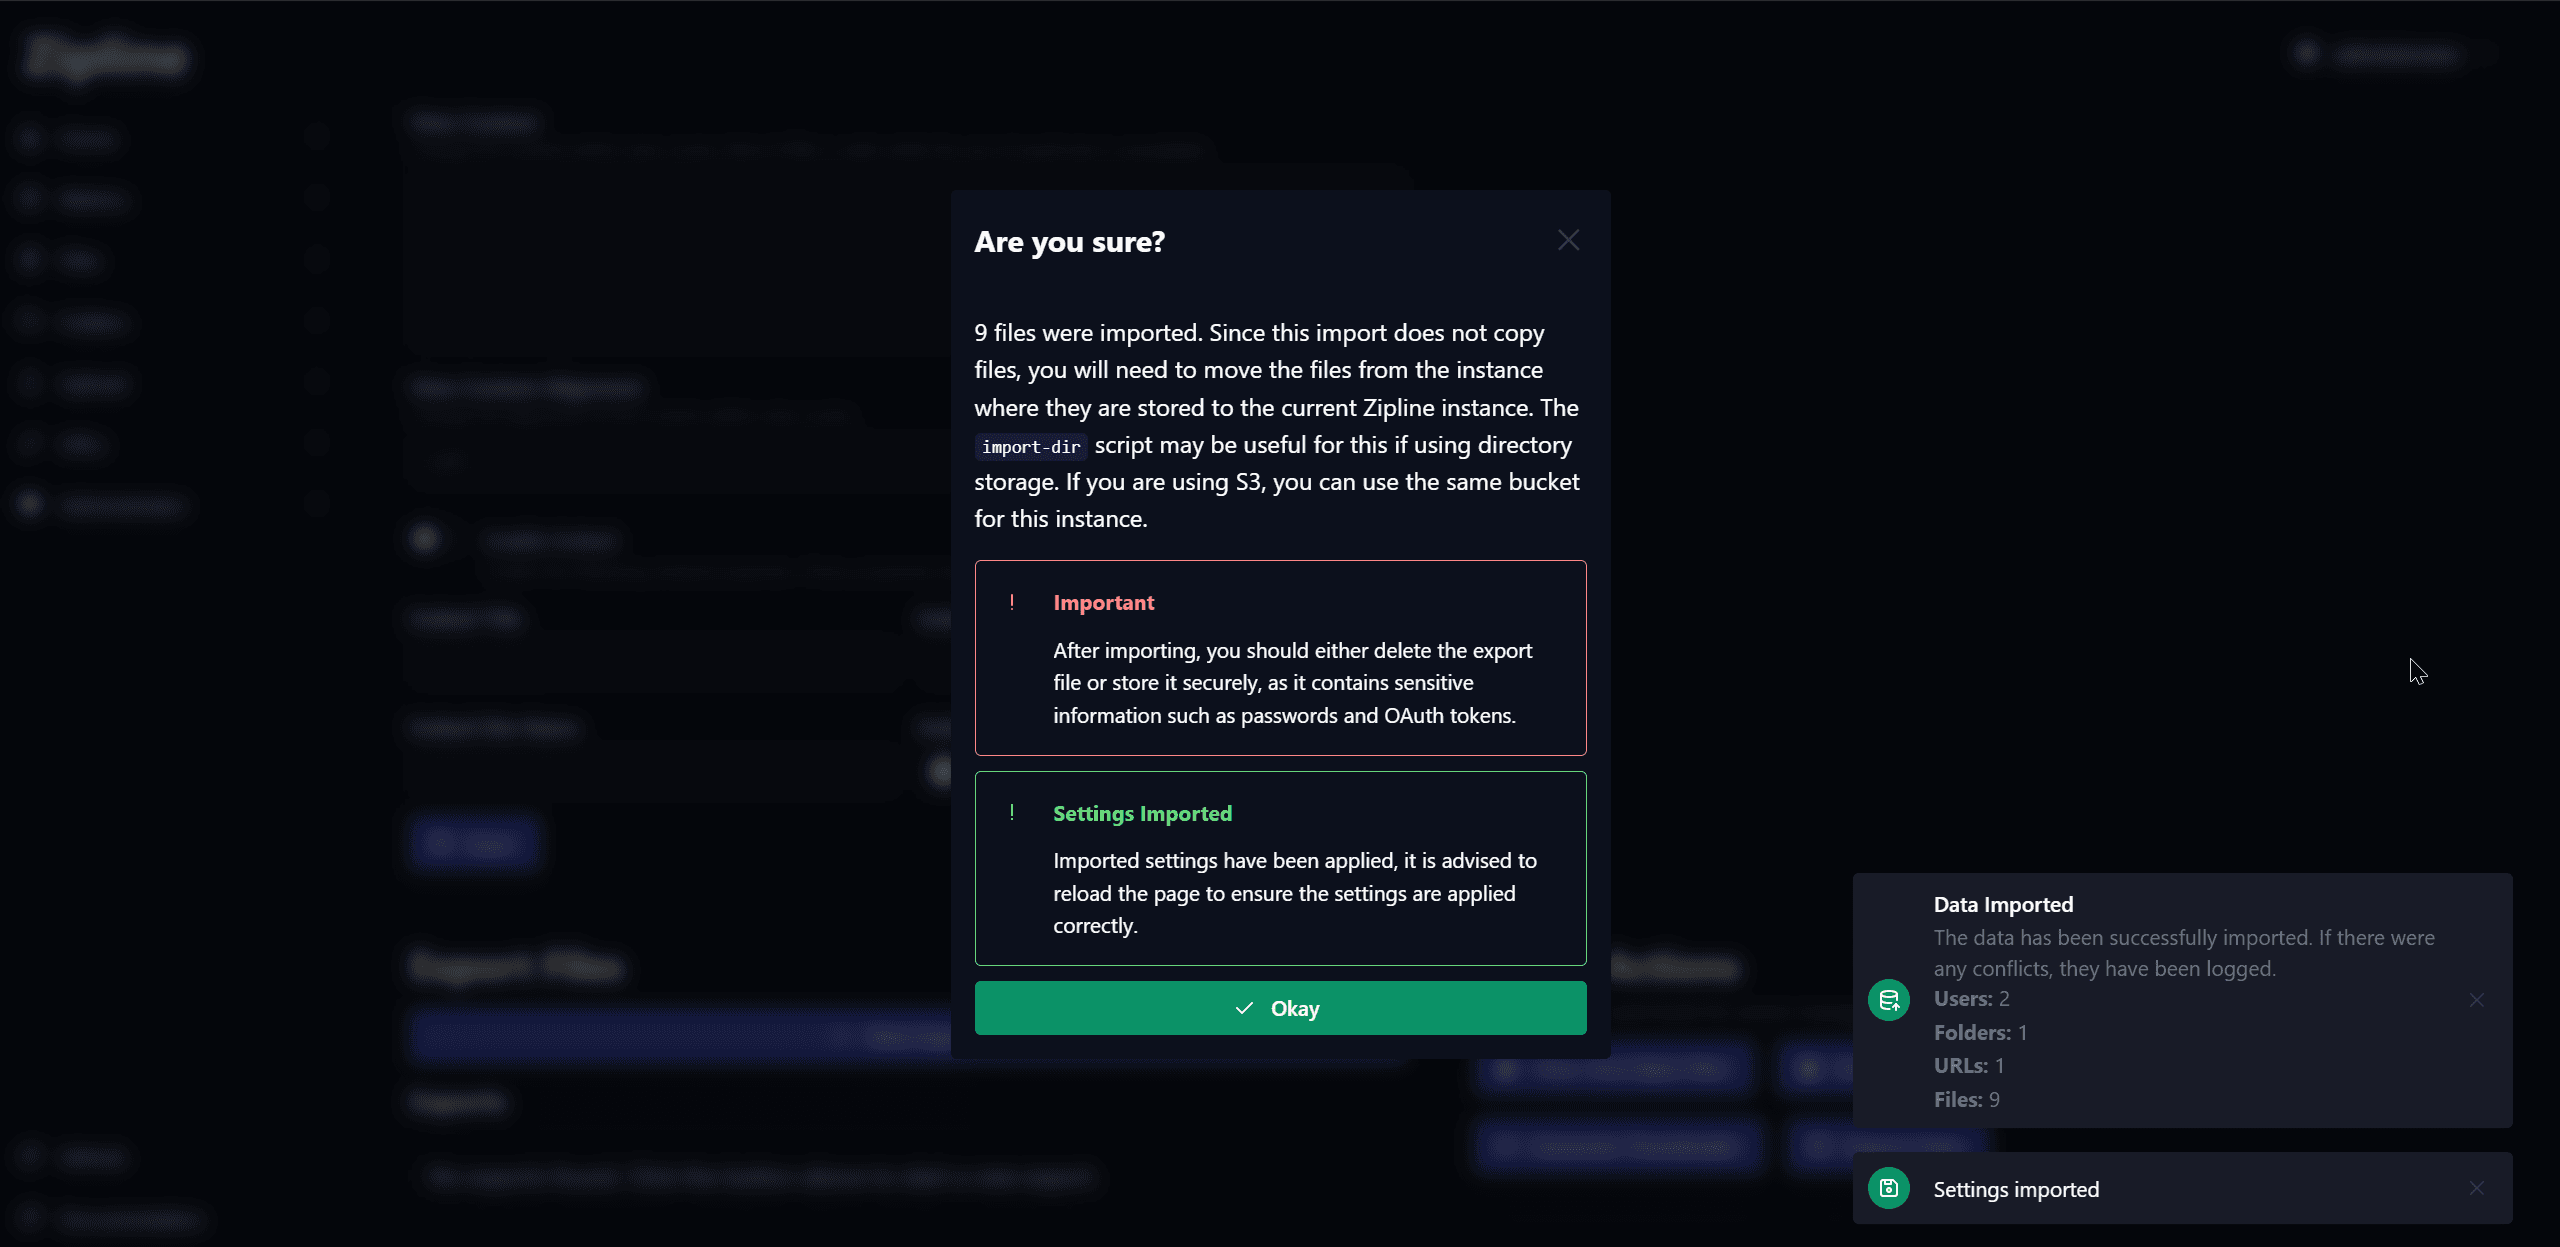
View Import Progress
The server will now start importing the data. This may take up to a few minutes (is generally pretty quick), depending on the size of the export.
Post-Migration
If you had any issues with migration, it is recommended to turn on debug logs, and run the import again. This will give you more information on what went wrong.
If the import was successful, the next step is the make sure your files are being served properly:
Local
If you're using the local datasource and haven't changed the file directory, the same volume will continue to work. Your files will remain accessible at their previous URLs and should still appear on the dashboard.
If you've opted to create a new local datasource for migrating to v4, simply copy over the data from your old datasource to the new one, and it should be accessible.
S3
If you're using the S3 datasource, you will need to make sure your S3 bucket is still accessible. If you have changed the bucket name, you will need to update the bucket name in the datasource settings.
Other than that, if nothing was changed in the S3 settings, your files should still be accessible at their previous URLs.
Troubleshooting
If you are having issues with the migration, please check the browser logs during the entire process, then check the server logs after the import has finished.
If you are still having issues, feel free to join our Discord server and ask for help, or open an issue on GitHub.
Other Changes
A lot of other changes have been made in v4, here are some notable ones:
- The API has been completely overhauled, most of it will not be compatible with v3's API.
- Old upload configurations will not be compatible with v4. To see what headers and options have changed, refer to Upload Options.
- The old
/r/{file}route has been remamed to/raw/{file}. Zipline currently does redirect/r/{file}to/raw/{file}, but it is recommended to update any links you may have to the new route.