Reverse Proxy
Guides for setting up reverse proxies for Zipline, including NGINX and Caddy
NGINX
server {
  listen 80;
  # Allows Zipline to handle large file uploads, feel free to change this value
  client_max_body_size 100M;

  # If you have a domain, replace <your domain> with it for DNS resolution
  server_name <your domain (optional)>;

  location / {
    # If Zipline is running on a different port or hostname, change the port here
    proxy_pass http://localhost:3000;
    proxy_set_header Host $host;
    proxy_set_header X-Real-IP $remote_addr;
    proxy_set_header X-Forwarded-For $proxy_add_x_forwarded_for;
    proxy_set_header X-Forwarded-Proto $scheme;
  }
}
NGINX Proxy Manager
You may be using NGINX Proxy Manager, a web interface for managing NGINX reverse proxies. You can follow the guide below to set up Zipline with NGINX Proxy Manager.
First navigate to your NGINX Proxy Manager dashboard, and click on the "Proxy Hosts" tab. Then click "Add Proxy Host".
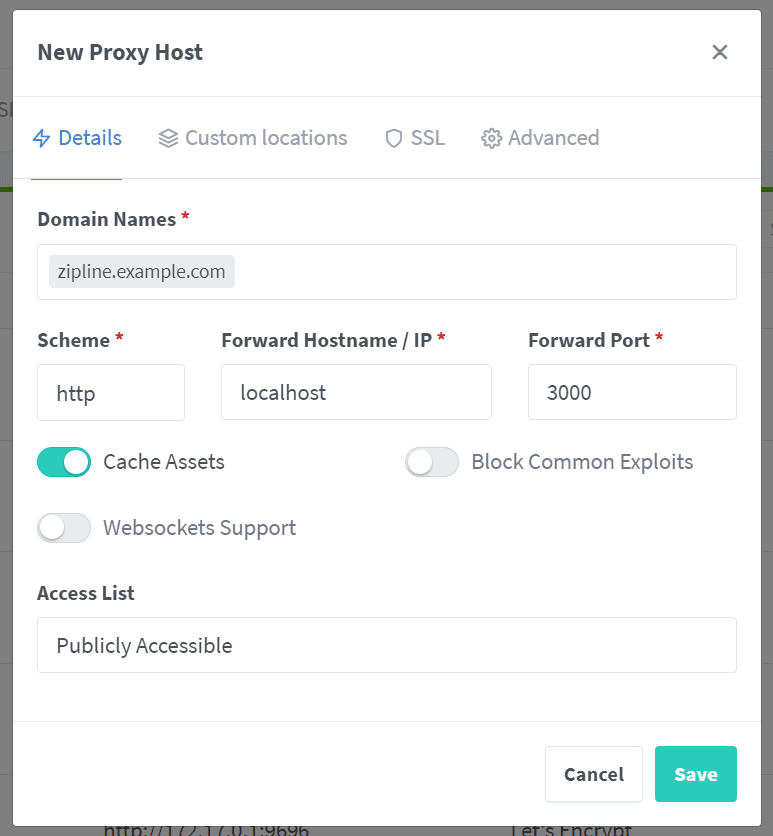
You may change the hostname and port to match your Zipline instance. If you are using a domain, you can enter it in the "Domain Names" field. In this example it is set to zipline.example.com.
Setting up SSL through NGINX Proxy Manager is also very simple, you can use the "SSL" tab to generate a certificate for your domain.

NGINX with SSL
You will need to have a valid SSL certificate to use this configuration. If you don't have one, you can use Let's Encrypt, or Cloudflare for example.
server {
  listen 443 ssl;
  client_max_body_size 100M;
  server_name <your domain>;

  # these paths can be anywhere, depending on where your keys are stored
  ssl_certificate /<your domain>.pem;
  ssl_certificate_key /<your domain>.key;

  location / {
    proxy_pass http://localhost:3000;
    proxy_set_header Host $host;
    proxy_set_header X-Real-IP $remote_addr;
    proxy_set_header X-Forwarded-For $proxy_add_x_forwarded_for;
    proxy_set_header X-Forwarded-Proto $scheme;
  }
}
Generating Cloudflare Certificates
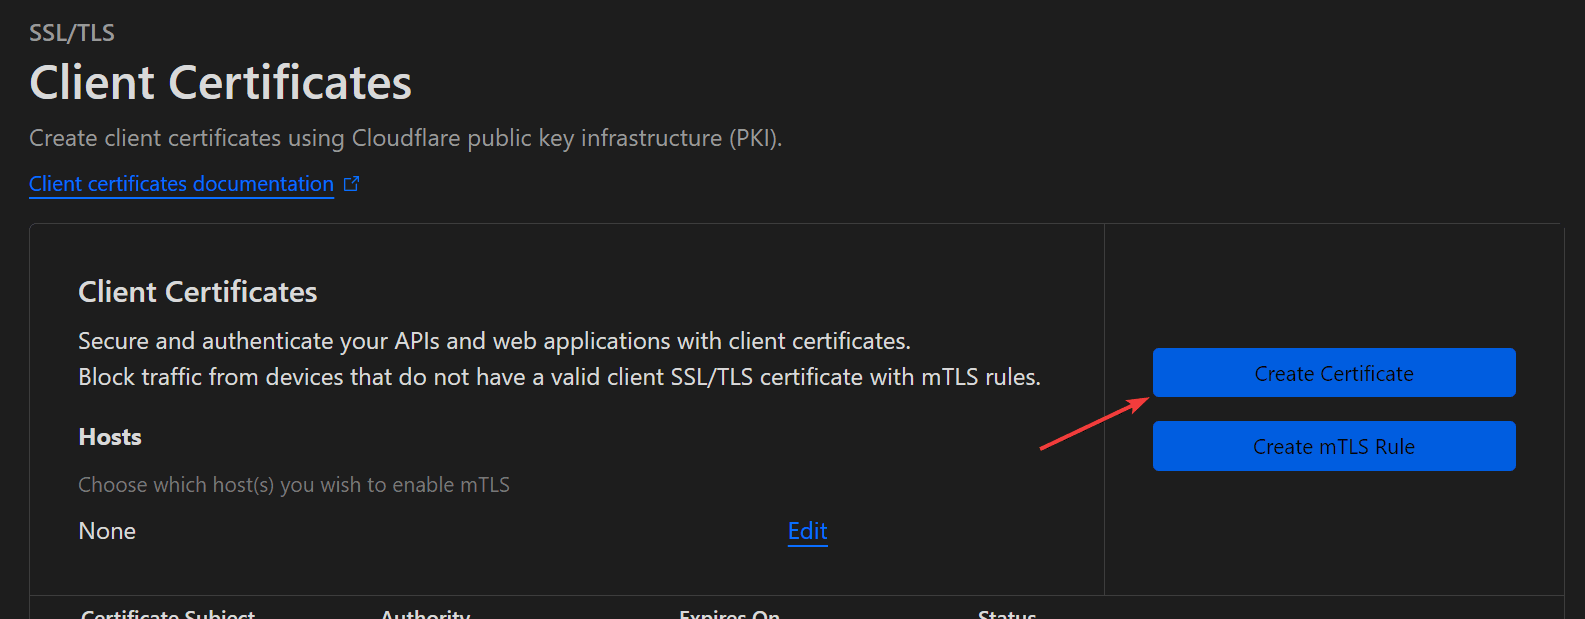
If you are using cloudflare, you can generate a certificate within the dashboard.
First visit dash.cloudflare.com and select your domain. Then navigate to the SSL/TLS tab, and click "Client Certificates". Then click "Create Certificate".
Next, make sure the options are like the following:
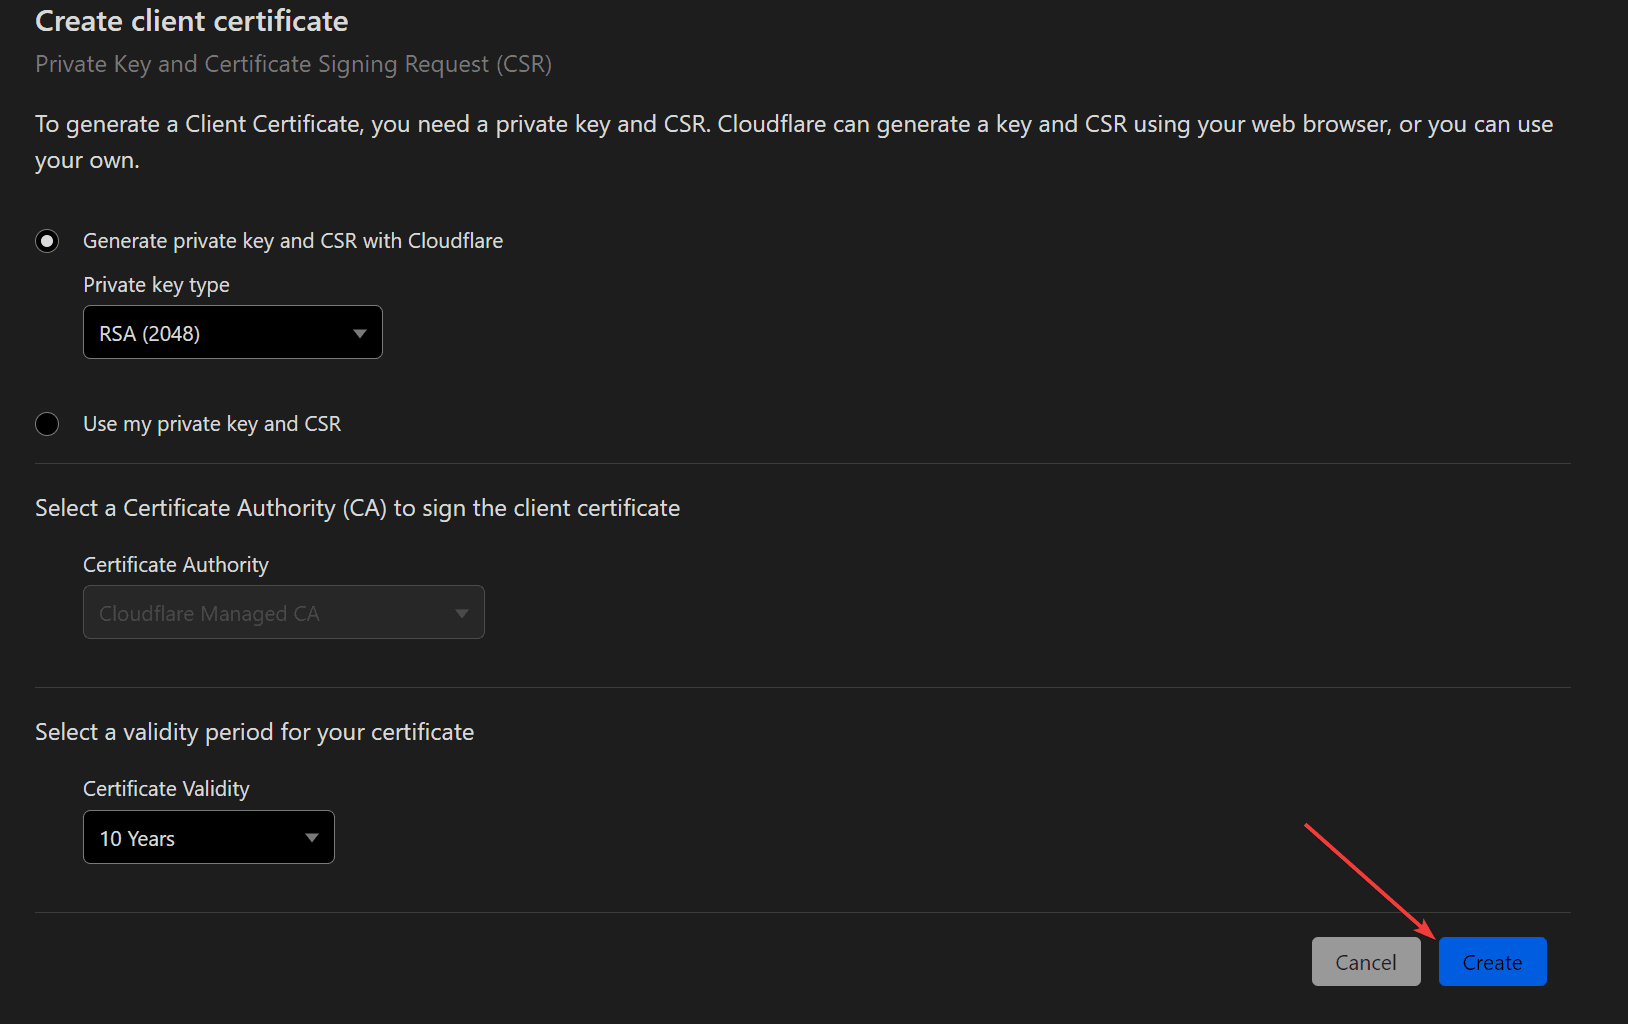
Finally, click "Next" and you will be presented with the public and private keys. Make sure the key format is set to PEM.
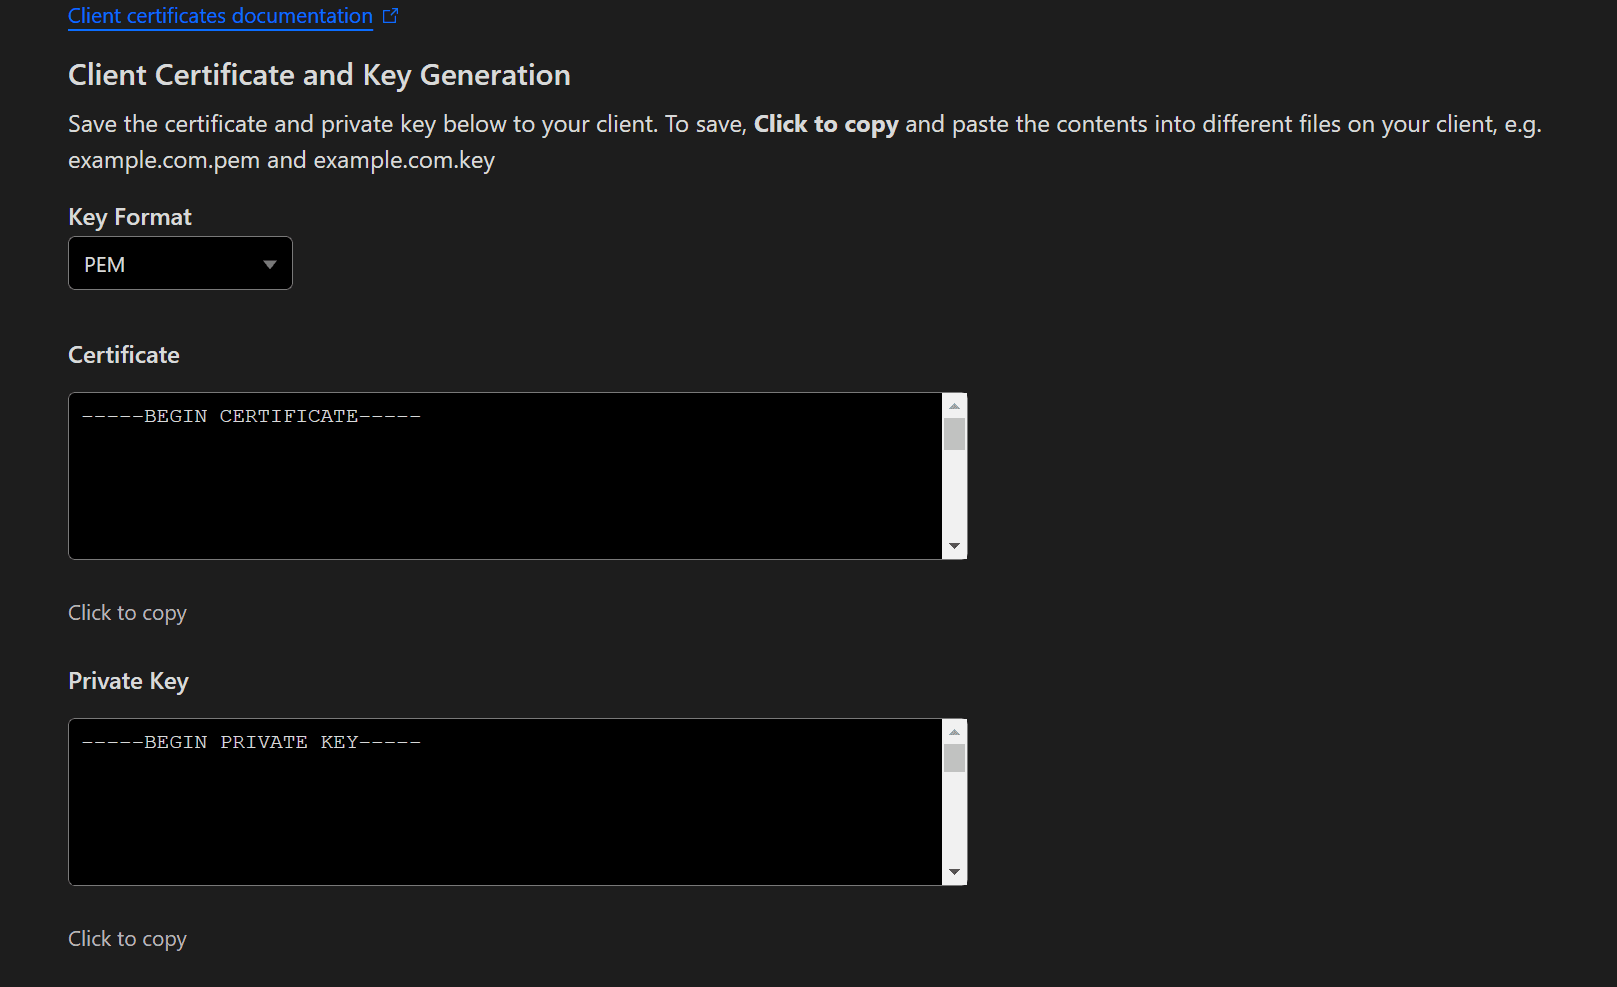
You will have to save the Certificate to <your domain>.pem and the Private Key to <your domain>.key. For example if your domain is zipline.example.com, you will have the following files:
/zipline.example.com.pem
/zipline.example.com.key
You can save these keys anywhere, but make sure your reverse proxy configuration points to the correct path.
Then within NGINX, you can use the following configuration:
server {
  ...

    ssl_certificate /<your domain>.pem;
    ssl_certificate_key /<your domain>.key;

  ...
}
Generating Certificates with Tailscale
If you are using Tailscale, and want to create a certificate pair for your domain (e.g. hostname.tails-scales.ts.net) to use with NGINX, you can use the following commands:
tailscale cert <domain>This will output a <domain>.key and <domain>.crt file. You can then use these files in your NGINX configuration.
Additionally, visit this page for more information on how to use the certificates.
Caddy
Setting up Zipline with Caddy is very simple. You can use the following Caddyfile configuration:
<your domain> {
  reverse_proxy localhost:3000
}
After setting up
After you have set up your reverse proxy, there are a couple of ssettings you should set to make sure everything works correctly:
CORE_TRUST_PROXY: This setting tells Zipline to trust theX-Forwarded-*headers set by your reverse proxy. This is important for getting the correct client IP and protocol (HTTP or HTTPS) in your application.CORE_RETURN_HTTPS_URLS: This setting tells Zipline to returnhttps://URLs for file links and other URLs when the request comes in over HTTPS. This is important for ensuring that your website is fully secure and doesn't have mixed content issues.- If SSL terminates at your proxy, you should turn this on so that file links and other URLs are returned as
https://. - This setting controls whether or not Zipline returns
https://urls anywhere in the app.
- If SSL terminates at your proxy, you should turn this on so that file links and other URLs are returned as