OIDC
Setting up Open ID Connect (OIDC) for authentication
This page documents and guides you through setting up Open ID Connect (OIDC) for Zipline. If you are having trouble configuring a different OIDC provider that is not listed here, feel free to join the Discord and ask for help.
Authentik
This will guide you through setting up an application and provider.
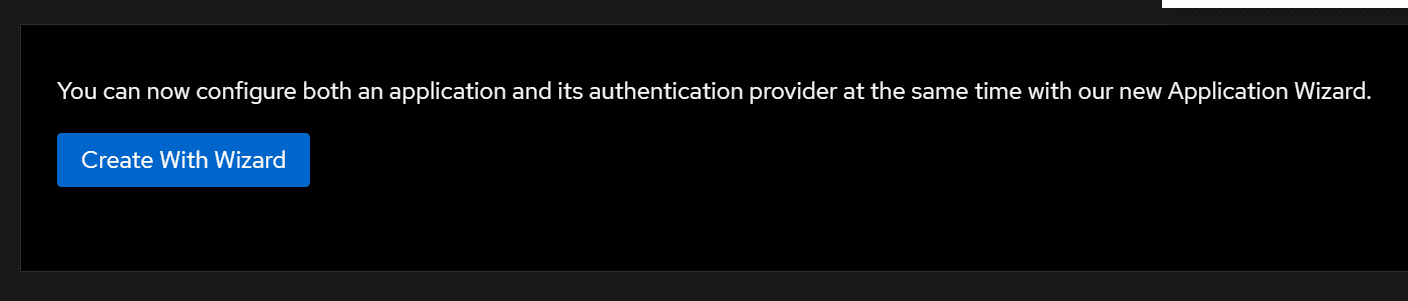
- Head over to your Authentik Admin Dashboard, and click on "Applications" in the sidebar.
- Click "Create with Wizard" to create a new application as well as a new provider. If this option is not available, you can create a new application and provider separately. The guide will assume you are using the wizard.
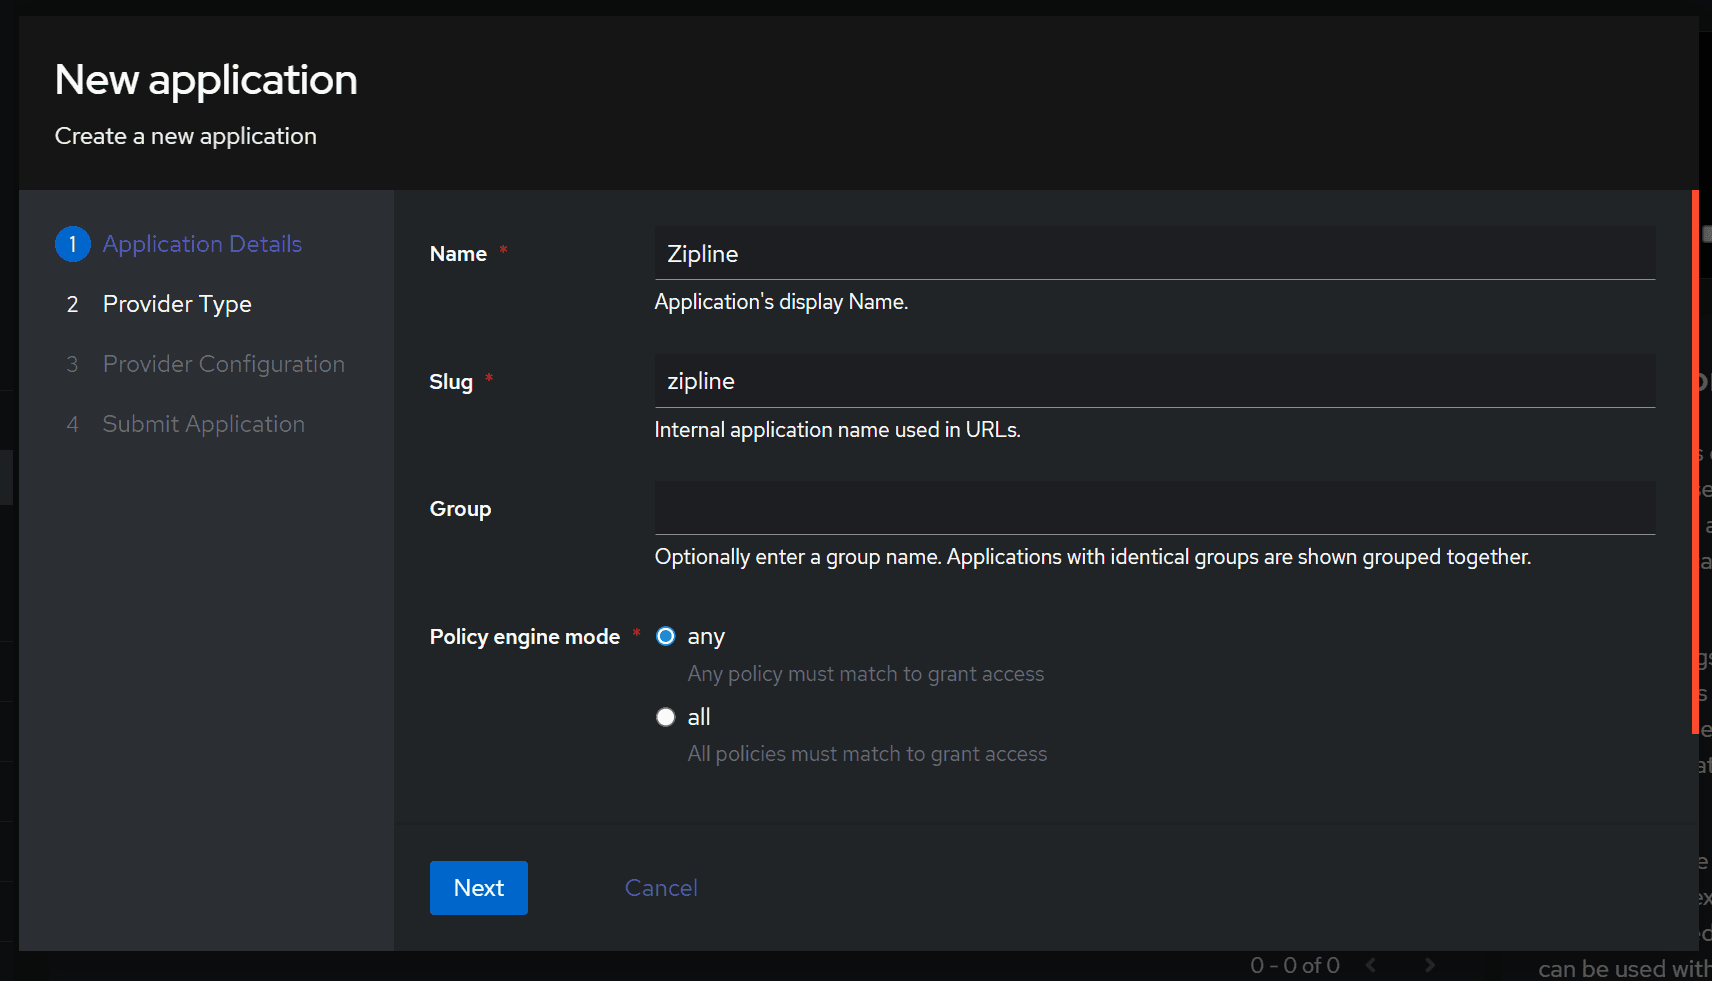
- Enter a name for your application, and click "Next".
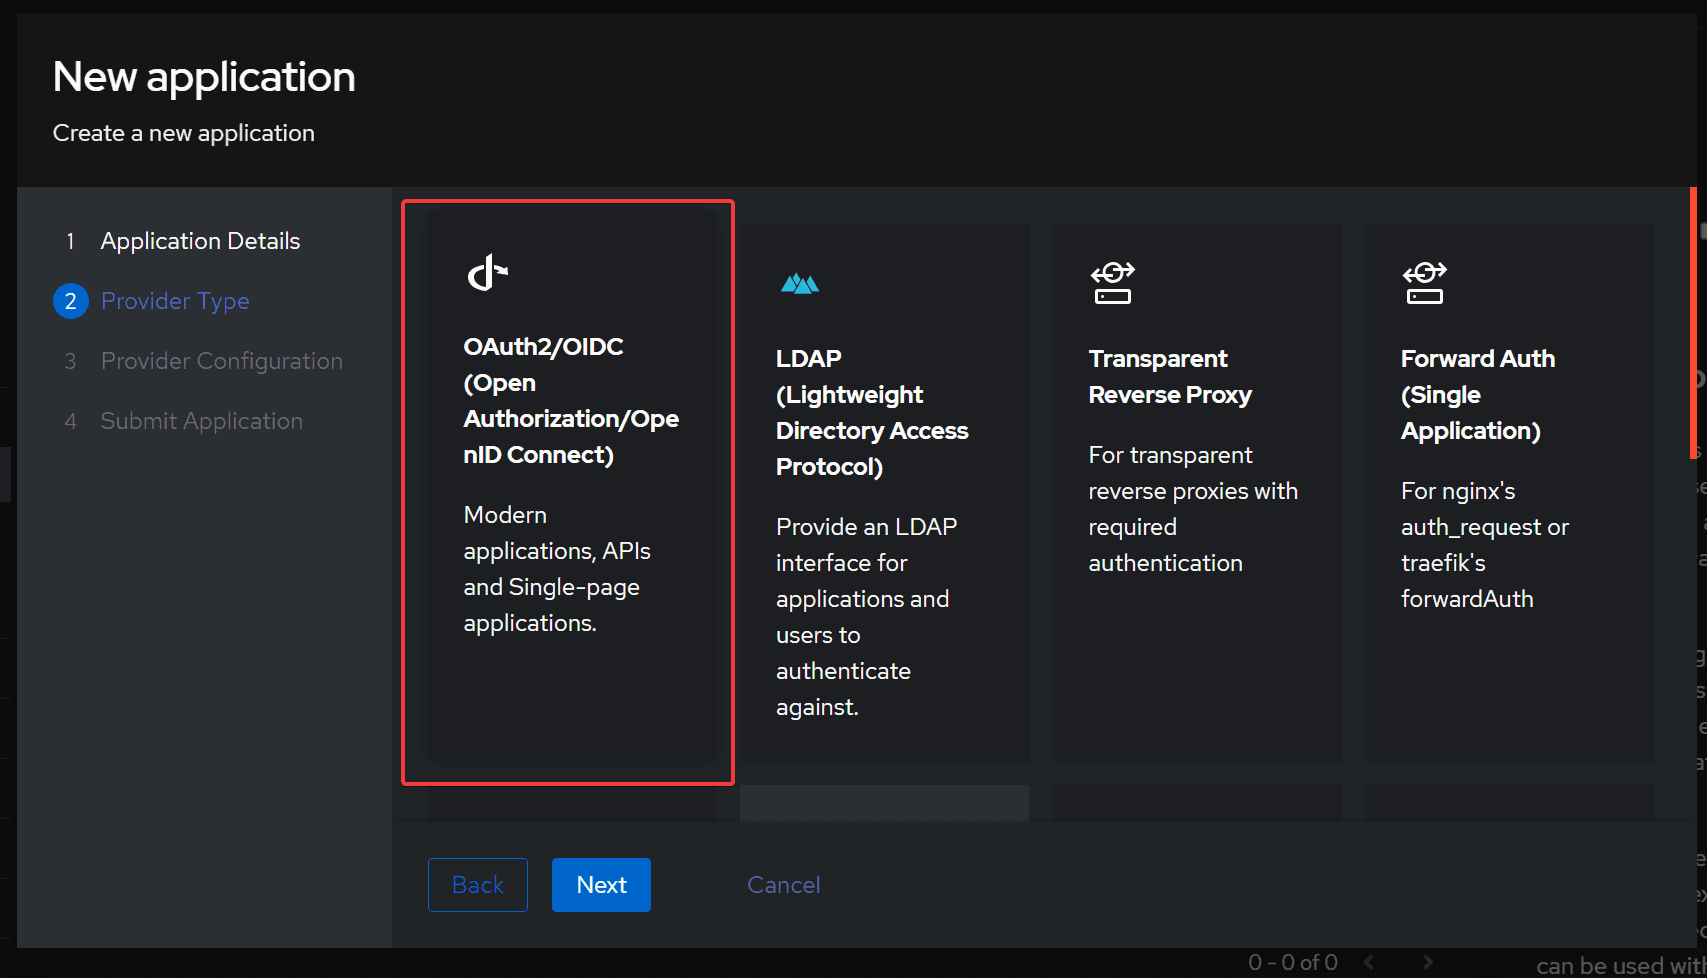
- Select the "OAuth2/OIDC (Open Authorization/OpenID Connect)" option, and click "Next".
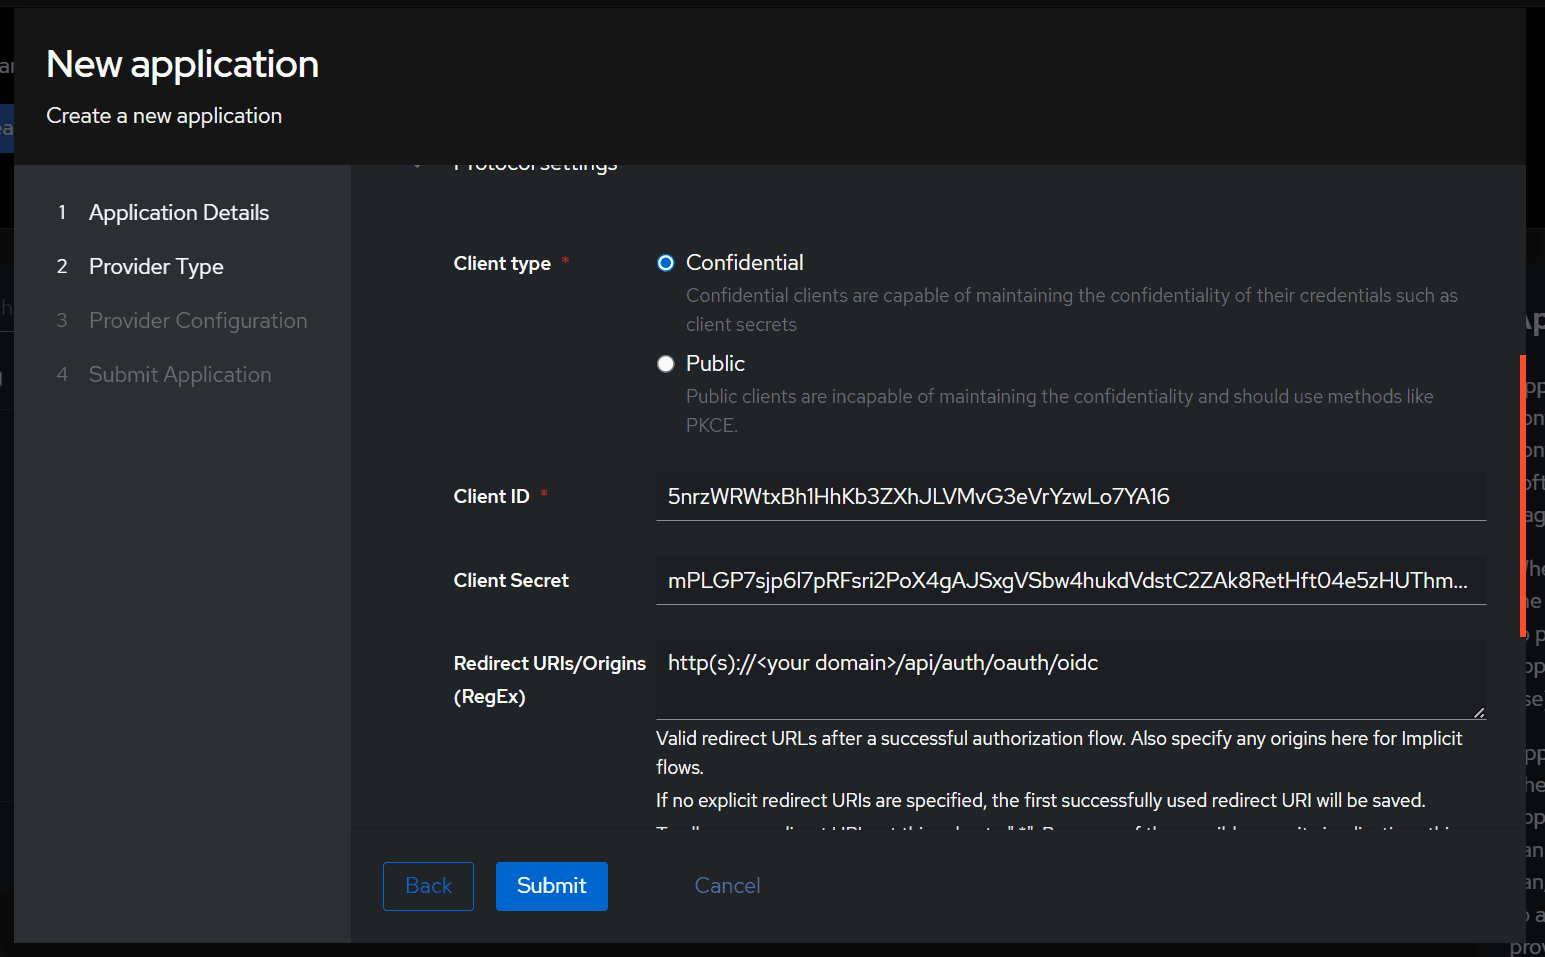
- Give the provider a name like "Zipline", and then select a Authorization Flow. You can select "default-provider-authorization-explicit-consent" for the default flow.

- Copy the "Client ID" and "Client Secret" from the "Protocol Settings" section, and save them for later.
- Fill out the "Redirect URIs" with the following URI:
http(s)://<your domain>/api/auth/oauth/oidc.
When clicking the "Login with OIDC" button, or linking your OIDC account, the
host that Zipline uses for the redirect URL will be the same as the host that
you accessed Zipline from. If you access Zipline from http://localhost:3000,
the redirect URL will be http://localhost:3000/api/auth/oauth/oidc. If you
are encountering issues with the redirect URL, you can set a custom redirect
URL in the settings dashboard. This MUST have the /api/auth/oauth/oidc
path at the end.
- Next, scroll down further and click on the "Advanced Protocol Settings" collapsible to expand it.
- Next to scopes enable the
offline_accessscope. In order to do this you may have to hold control and click on theoffline_accessscope. Theemail,openid, andprofilescopes are also required.
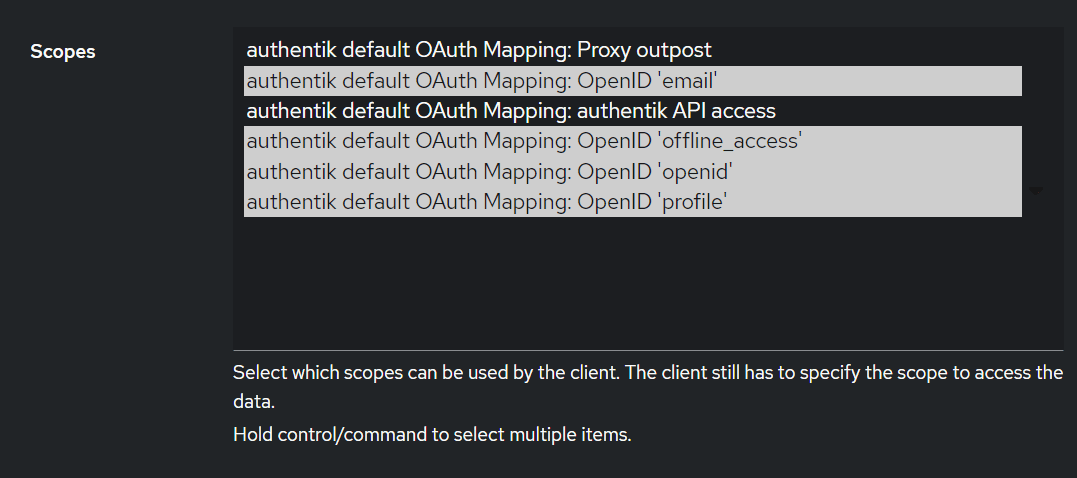
- Click "Submit", and close out of the modal.
Configure Zipline
- Navigate to your Zipline instance and go to the settings dashboard, scroll down to the "OAuth" section.
- Paste the "Client ID" and "Client Secret" into the respective fields within the OIDC section.
Then fill in the values:
- Authorize URL:
https://<authentik domain>/application/o/authorize/ - Token URL:
https://<authentik domain>/application/o/token/ - User Info URL:
https://<authentik domain>/application/o/userinfo/
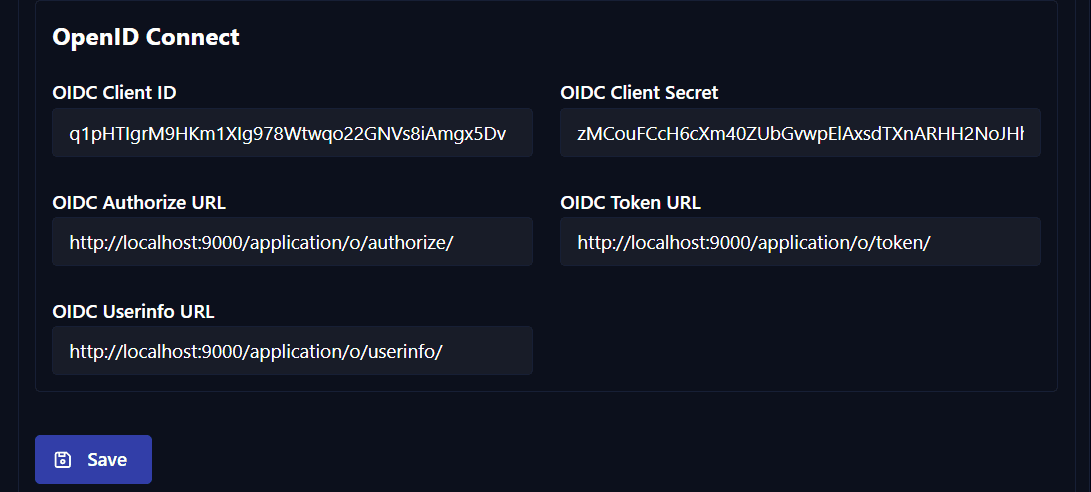
After these fields are filled out (click Save to save your changes), you should see a "Login with OIDC" button on the login page, as well as the option to link your OIDC account in the manage account page.
Pocket-ID
Pocket-ID is a simple self-hosted OIDC provider that utilizes passkeys for authentication.
- Create an OIDC client
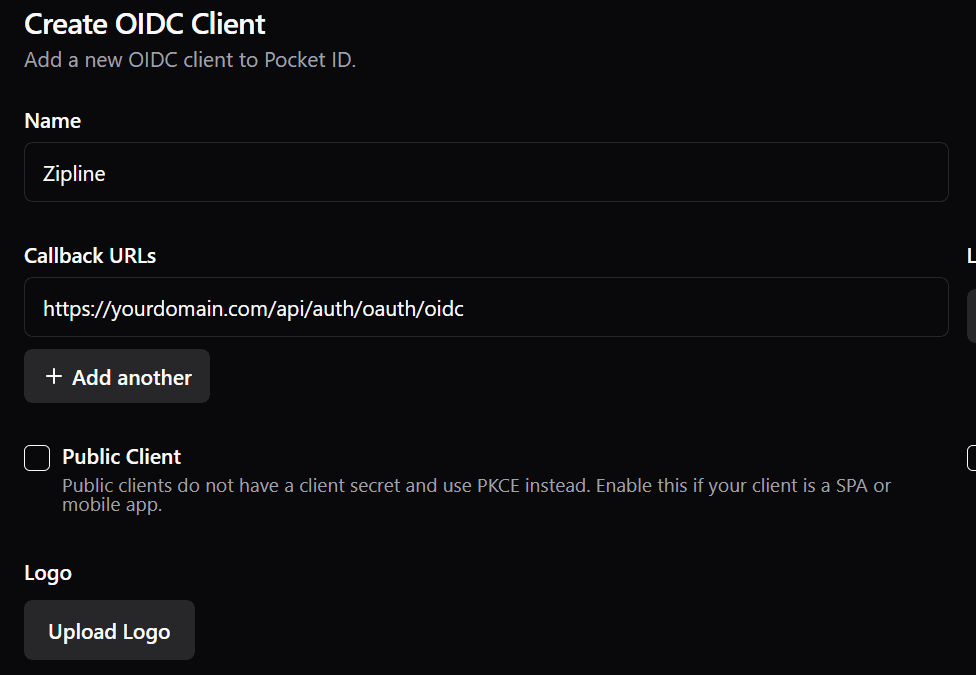
For the Redirect URIs: add http(s)://<your domain>/api/auth/oauth/oidc
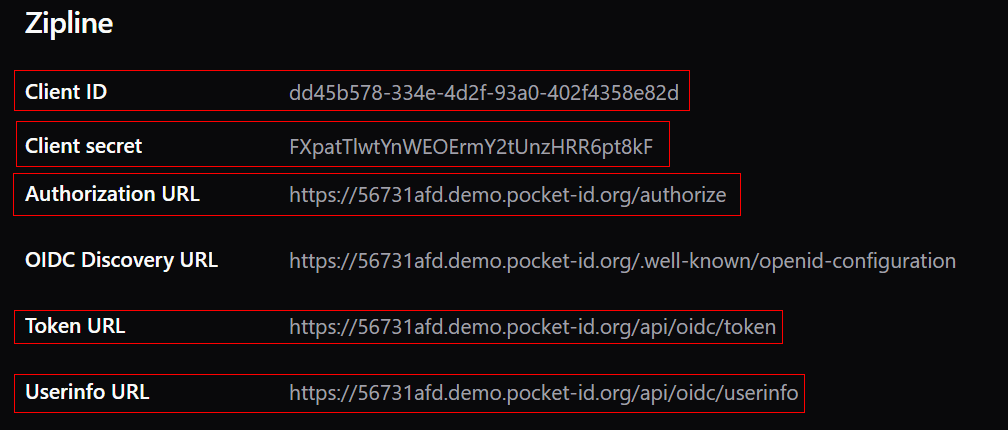
- Copy over these 5 values and urls to their respective fields in the OIDC section of the OAuth settings
Microsoft Entra
Microsoft Entra ID is a cloud-based identity and access management service. It also offers OIDC support and endpoints.
In the Entra admin center, register an application and grab the Application (client) ID and a client secret from "Certificates & secrets". The tenant ID is the directory ID of your Entra tenant which goes in the URLs below, not in the Client ID field.
- Client ID: your app registration's Application (client) ID
- Client Secret: your app registration's client secret
- Authorize URL:
https://login.microsoftonline.com/<tenant_id>/oauth2/v2.0/authorize - Token URL:
https://login.microsoftonline.com/<tenant_id>/oauth2/v2.0/token - User Info URL:
https://graph.microsoft.com/oidc/userinfo
Other OIDC Providers
The guide above is specific to Authentik and may require modifications for other OIDC providers. While the overall steps and URL names will be similar, some details may differ.
If you're using a different OIDC provider, refer to their documentation to obtain the necessary details for configuring the Zipline settings dashboard.